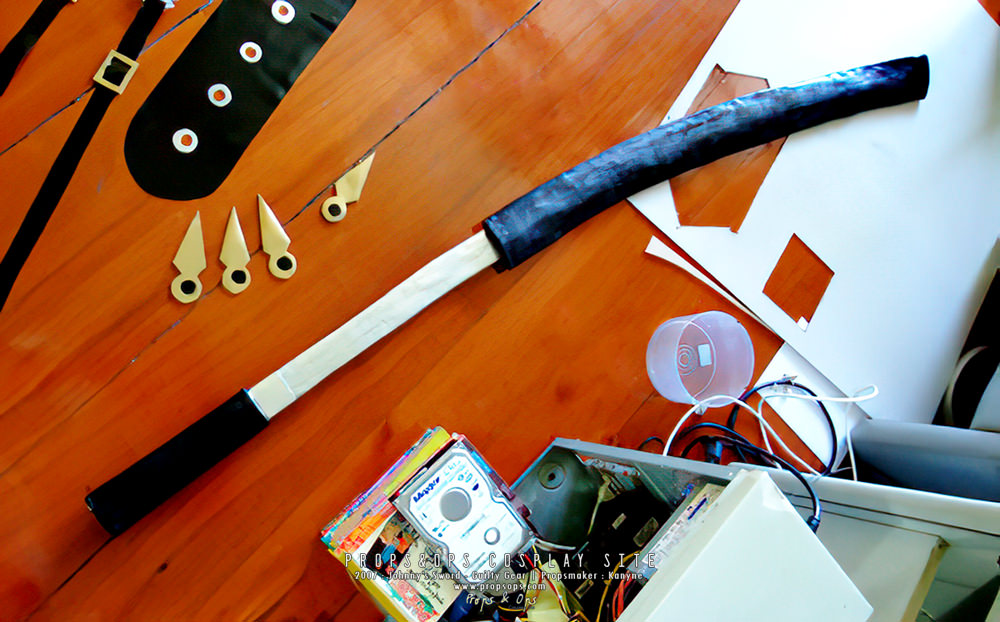
เอาส่วนตัวดาบก่อนละกัน ตัวดาบ ใช้ไม้บาร์ซาร์เป็นแกนหลัก ตรงด้าม ประกบไม้บาร์ซาร์หน้าหลัง แล้วพันด้วยโฟมยางหนึ่งรอบ เพื่อให้ได้ด้ามจับที่มีขนาดพอดีมือ
เสร็จแล้วใช้วิธีเปเปอร์มาเช่ ปะตัวดาบไปเรื่อย ๆ (ในที่นี้แปะไปแค่สามรอบเนื่องจากเวลาไม่พอ จริง ๆ ควรจะ 6-9 รอบ) แล้วจึงใช้วอลพุตตี้ทา ตรงนี้ผมใช้วอลพุตตี้ผสมน้ำ กะผสมดี ๆ ถ้าเหลวไปทาไปก็ไหลลงหมด แล้วจะได้ออปที่นิ่มด้วย ถ้าข้นไปก็จะทายากและจับตัวเป็นก้อน(จะมีผลทำให้ตอนขัด ขัดลำบาก) เมื่อทาได้สัก 6-9 รอบ ก็ค่อยขัดให้เรียบตามใจชอบ (ทั้งตอนเปเปอร์มาเช่และตอนใช้วอลพุตตี้ เมื่อทำชั้นนึงต้องรอให้แห้งก่อนจึงจะทำชั้นต่อไปได้ ตรงนี้ทำให้เสียเวลามาก) ขัดเสร็จแล้วก็พ่นสี เป็นอันเสร็จ
ปลอกดาบ ในรูปผมเอาปลอกเก่ามายันเป็นโครง(ด้วยไม่มีเวลาอีกเช่นกัน) วิธีทำเหมือนตัวดาบหมดเลย เพียงแค่เปลี่ยนจากที่เอาไม้บาร์ซาร์มาเป็นฐาน ให้เปลี่ยนเป็นเอากระดาษแข็งมาเป็นฐานแทน แล้วก็เปเปอร์มาเช่แล้ววอลพุตตี้แล้วขัดตามวิธีการเดียวกันเมื่อเสร็จแล้วก็พ่นสี ได้ออกมาเป็นดาบ พร้อม ปลอกดาบ อย่างที่เห็น
พอดีเวลาทำน้อย เลยเผาออกมาแบบรีบมาก ทำให้ใบดาบแข็งไม่เท่าที่ควร
ส่วนปลอกก็ไม่ได้จัดให้โค้งมนเท่าไหร่ แถมยังลงพุตตี้ได้แค่ไม่กี่ชั้น ทำให้ไม่สามารถขัดให้เรียบสวยได้เท่าที่ควร วิธีเปเปอร์มาเช่นี้สามารถนำไปประยุกต์ใช้ทำออปอื่น ๆ ได้อีกเยอะครับ อยากได้แข็ง อยากได้อ่อน ขึ้นอยู่กับสัดส่วนผสมที่เราใช้ตอนเปเปอร์มาเช่และตอนปาดวอลพุตตี้ จะมีข้อเสียของมันอยู่ก็คือการที่ต้องรอแห้ง เลยทำให้เป็นวิธีที่ต้องใช้ความอดทนและเวลาพอสมควรครับ ลอง ๆ เอาไปใช้ดูละกันนะครับ ^^;
[English text by Silfer]
Let’s start with the blade part first. Balsa wood was used as main core. More balsa woods covering both sides of the handle then wrap with rubber foam once to get it at the right size. Afterward, use the papier-mache method to patch on the blade. I did only thrice here because of hurrying, but actually, it should be about 6 – 9 times. Later, coat it with wall putty that was well-mixed with water. If it was mixed too much with water, then it’ll flow and drip. But if it was mixed too little, then it’ll be too hard to coat and also stick into clods. Coat for about 6 – 9 layers then scrub to smoothen it. After that, finish it with color spray. (Each layer of papier-mache and wall putty processes must be dried first before starting the next layer, which makes these two processes taking very long time.)
For the sword’s sheath in the picture, I used the old one as the structure (due to hurrying as well). The method is just the same as the blade, but changing the balsa wood to cardboard instead. The rest of the processes are just the same as you can see below.
I didn’t have that much time doing this piece so the blade isn’t as strong as it could be. The sheath isn’t curved enough as well and also didn’t coat with wall putty that much which makes it harder to scrub neatly.
The papier-mache? method can also be applied to many other ops. The degree of its hardness will depend on the portion when you mix with water. However, this method also takes very long time to finish since you need to wait for it to dry so you’ll need a lot of patience. ^^;

|
Date: 19 สิงหาคม พ.ศ.2550 | 19th August 2007